Move ASPNETDB from local machine to a SQL Server (quick way)

Leave a comment

I had a ASPNETDB database with a bunch of users, roles, etc that I setup that I had been using for quite a few years, and it functioned fine using SQL Express.  It would just sit in the App_Data folder and any time I needed to work on the asp.net site I would just make sure not to overwrite the one on the server.   Not wanting to spend a lot of time on this I needed a quick and easy way to move this to a central location where I wouldn’t be in danger of accidentally overwriting the current  ASPNETDB  .  I also needed it to be properly be backed up accessed remotely.  Basically I just attached it to a production SQL Server 2008 R2 that I had onsite and changed my connection string in my web.config.  Here’s the instructions:

  1. Copy the most up to date ASPNETDB.mdf and ASPNETDB_log files up to your server and place them in whatever directory  you want .
  2. Open SQL Management Studio.
  3. Attach the aspnetdb.mdf file by right clicking on databases and clicking attach.
  4. I think by default it names the database with the full path of the database, so I just renamed mine to ASPNETDB.
  5. Go to your web.config file and put in the following string under the connectionstrings section:


<remove name="LocalSqlServer"></remove>


<add name="LocalSqlServer" connectionString="Data Source=MySQLServer;Initial Catalog=ASPNETDB;Persist Security Info=True;User ID=myusername;Password=mypassword" providerName="System.Data.SqlClient" />

That should be it. I loaded up my ASP.net pages and it functioned like it normally does.

ASP.NET and SQL – Populate Gridview Programmatically To Solve “Timeout Expired”

Leave a comment

It can be really frustrating in ASP.NET when you get the  timeout expired.  By default SQL server allows a 30sec timeout for queries.  The problem is that sometimes we have queries that pull large amounts of data on an old server and it is just going to take  >30 seconds to execute.  For instance, I have a few reports that I created for the end of the year that have to crunch a years worth of data that can take a long time.   Other thing is if you’re using a Sqldatasource there is no great way to increase the timeout.  This is a simple way to use codebehind to populate your gridview while giving you the flexibility to increase the timeout to whatever you want.

The error you usually get is the following:

Timeout expired. The timeout period elapsed prior to completion of the operation or the server is not responding.

To accomplish this you may need to put Imports statements up at the very top of the page like so:

Imports System.Data.SqlClient
Imports System.Data.Sql
Imports System.Data.SqlTypes

Then create your SQL String like you normally would.

Strsql1 = “SELECT dbo.[ridiculous_amt_of_data].[moundofdata] FROM dbo.[ridiculous_amt_of_data]”

Then add the following obviously substituting your information.

Dim MyConnection As System.Data.SqlClient.SqlConnection
Dim MyCommand As System.Data.SqlClient.SqlCommand
Dim MyDataReader As System.Data.SqlClient.SqlDataReader
MyConnection = New System.Data.SqlClient.SqlConnection("server=YourIPAddressOrHostname; initial catalog=YourDatabaseNameHere;uid=YourUsername;pwd=YourPassword")
MyConnection.Open()
MyCommand = New System.Data.SqlClient.SqlCommand
MyCommand.Connection = MyConnection

Set your sql string here

MyCommand.CommandText = strsql1

Adjust your timeout here

MyCommand.CommandTimeout = "120"
MyDataReader = MyCommand.ExecuteReader

Change These To Your Gridview Name  And Then Close Everything Out  

GridView1.DataSource = MyDataReader
GridView1.DataBind()
MyDataReader.Close()
MyDataReader = Nothing
MyCommand = Nothing
MyConnection.Close()
MyConnection = Nothing

Another reason that this error may happen, according to MS, is that there are uncommitted transactions in the database. Here’s some more information on the topic.

http://blogs.msdn.com/b/spike/archive/2008/07/31/timeout-expired-the-timeout-period-elapsed-prior-to-completion-of-the-operation-or-the-server-is-not-responding.aspx

SQL Long Date To Short Date

Leave a comment

I always forget how to do this so I figured I would create a post on it. A lot of times when querying a database with a date i will get the long date like so:

2011-05-12 00:00:00

Simple way to solve this, especially if you’re sending this to someone as a report is to use convert like so:

CONVERT(VarChar, GetDate(), 101)

Of course you can replace “GetDate()” with a value from your database like:

CONVERT(VarChar, dbo.[mytable].[my-datebase-date], 101)

Here’s some information on the command including changing the dates into other formats
http://msdn.microsoft.com/en-us/library/ms187928.aspx

Hope this helps someone.

Deploying An Asp.Net Site To Network Solutions With Membership

13 Comments

Tools Used:

Visual Studio 2008 Professional Edition

SQL Server Management Studio

Recently I was developing an ASP.NET site which worked fine on my computer, but when I went to deploy it to Network Solutions, it did not work, and their Support was not very helpful.  They told me  that membership could not be used. They also told me that asp.net, while supported, could not be used on the server since it is shared hosting environment.  Further they told me that they could not create an “Application” like I would using IIS also because it is a shared hosting environment.  They also do not have an option (in windows) for VPS that would allow full control.  All the stuff they told me  is basically not true or only partially true.

First off in order to get your asp.net site up and running (without membership) all you have to do is copy your aspx files to the root of the htdocs folder that they supply for you.  This in itself is an application directory and because of this you can run ASP.NET pages.

Second, you can use membership by going to their admin pages, creating a database, exporting your data and schema from your current membership database, and then running a script in query analyzer. Here’s how you do this:

1.       To start off you should have a site with membership that allows you to login successfully from your local computer. There are plenty of tutorials online that will help you out with this but it’s beyond the scope of this post.

2.       Now we create the sql database on Network Solutions.  Go to Manage Account>>My Hosting Packages>>Click on Web Hosting Toolkit>>Go down to the bottom of the page and click Database Manager >>Click Microsoft SQL Server (Note: if nothing pops up and you get “sessionId=0”, logout using the link on the top right hand side of the page.)

3.       Click Add to add a new DB . Then enter your information for the new database.  Just make a note of what you entered here:

4.       Now that we have a DB, lets connect to it using SQL Server Management Studio.  Network Solutions gives you the address to which to connect to after you create the database.  When you are in database manager , select your newly created database and then click edit to view it. Open SQL Server Management Studio and enter the ip address, your username and password to connect.

5.       Now that you are connected, minimize SQL Management Studio, and then open up your website in Visual Studio. We will now we will create the .SQL script to recreate the schema and data on the network solutions database we created above.

6.        In Server Explorer, Right Click on aspnetdb.mdf and click “Publish To Provider”, then follow the wizard. This will create a sql script replicating the aspnetdb.mdf database. here’s what my screen looked like.

7.       Now that you have the sql script created, open it using your favorite text editor, and then copy all of it’s contents.

8.       Go back to SQL Management Studio, Find your database name under databases and (you can see all network solutions databases hosted on that shared server), single click it and then click “New Query”.  This will open up a sql window.

9.       Paste all the code that you copied in step 7, and execute the script.  This should recreate all your user information, roles, security, etc.  I did not have any errors when doing this so I can’t really help you out if it doesn’t work.

10.   Next modify your web.config file to include a new connection string to point to this new database. Here’s the string that I used in my web.config file.


<connectionStrings>
<remove name="LocalSqlServer"/>
<add name="LocalSqlServer" connectionString="Data Source=IPAddress;Initial Catalog=URDBName;User Id=URUsername;Password=***********;" providerName="System.Data.SqlClient" />
</connectionStrings>

11.   Next ftp all of your files up to Network Solutions server using the Manage Account>>FTP/ContentPublishing  provided by them.  I use filezilla, it’s easier.  I uploaded them to the root of the htdocs folder, and voila everything worked.

Another note, Network Solutions support was telling me that If I have an access database (which I do), I need create a new folder called “db” under the HTDocs folder and adjust my code to point to this folder.  They said this is due to permissions. This worked flawlessly.

Another note: If you use smtp in your asp.net, create your email address in network solutions Manage Account, and then add the following information to your web.config file:

<system.net>
<mailSettings>
<smtp from="myemailaddress@mydomain.com">
<network
host="localhost"
port="25"
userName="myemailaddress@mydomain.com"
password="*********" />
</smtp>
</mailSettings>
</system.net>

I would also like to give credit to this site for information on the Visual Studio schema export.

Using a 32bit Progress Openedge Driver with SQL Server 2008 on 64bit server

1 Comment

Disclaimer: this should only be tried on a non production server as it involves modifying the registry. At the very least test it thoroughly before trying.  I will not take responsibility for any problems that you may have with your SQL database

My setup is a Windows 2003 Standard Edition 64bit server, with Progress Openedge 10.2A installed, and from what I’ve read is that they don’t have a 64bit driver. So the problem is that the server is 64bit, but progress’ driver is 32bit. Another note (really not sure if this matters and don’t have the time to reinstall right now) is that I have SQL 2008 installed in 32bit mode so if this does not work for you, you might want to look into that.

I had a lot of trouble with this one, but I finally got it to work a few months ago.  I’ll post how I got it to work.  The key to my frustrations was I did not have SQL 2008 Service Pack 1 installed.  MS totally dropped the ball on the ODBC wizard and forgot to include the necessary information  on the wizard to allow you to connect to an ODBC source using the .NET framework driver for ODBC.  I’ll show you how to do it in the following steps.

There’s a few things I had to do to get this to work.  The first part is that I had to create a 32bit registry entry:

Create a new text file  with the following information in it to be imported on the Windows 2003 64bit server. (remove the ***start*** and the ***********end******* )

******************************start*********************

Windows Registry Editor Version 5.00

[HKEY_LOCAL_MACHINE\SOFTWARE\Wow6432Node\ODBC\ODBCINST.INI\ODBC Drivers]

“Progress OpenEdge 10.2A driver”=”Installed”

[HKEY_LOCAL_MACHINE\SOFTWARE\Wow6432Node\ODBC\ODBCINST.INI\Progress OpenEdge 10.2A Driver]

“Driver”=”C:\\Progress\\OpenEdge\\bin\\pgoe1023.dll”

“Setup”=”C:\\Progress\\OpenEdge\\bin\\pgoe1023.dll”

“DriverODBCVer”=”3.50”

“APILevel”=”1”

“ConnectFunctions”=”YYN”

“CPTimeout”=”60”

“FileUsage”=”0”

“SQLLevel”=”0”

“UsageCount”=”1”

***********************end*********************

Then I saved it as a “.reg” file so when it is double clicked it will import into the registry.

Next we have to create the ODBC Entry using the 32bit version of the ODBC Data Source Admin.  “Go to C:\WINDOWS\SysWOW64\odbcad32.exe”  (assuming your win install is on C:\ )  and create your data source, obviously choosing the Progress Openedge 10.2A driver.   I named mine “MySystemDSN”

Now, that we have that setup, we need to run the 32bit version of the SSIS Import Wizard.  We find this in the “D:\Program Files (x86)\Microsoft SQL Server\100\DTS\BinnDTSWizard.exe”  (assuming that SQL is installed on your D drive.)

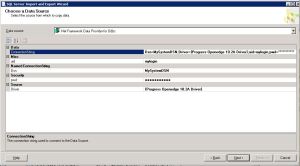
Now using the wizard choose the following and setup you want to enter a connection string like so.  I keep this in an easily accessible file so I can quickly paste it in at any time.

Dsn=MySystemDSN;Driver={Progress Openedge 10.2A Driver};uid=mylogin;pwd=mypasswd

32bit odbc wizard

As soon as you paste it in, all of the fields in the wizard  magically appear (why they’re not there to begin with is  baffling to me)  If you do not have SQL 2008 SP1 Installed, these would not pop up thus not allowing you to connect to the database. If I remember correctly it would say something like “you must enter the required fields” or the connection string needs a password or something to that affect.

You can go through the rest of the wizard and import the data successfully.  One thing that I should note. Is that it wasn’t properly recognizing dates. on the import  They would show up as a data type of “24” or some number like that, so I had to change them to a date datatype.

I don’t know a ton about Progress Databases except how to fix SQL Width problems and export a table to a csv file.  I basically import relevant data and tables from our ERP system which is a Progress database which allows an ODBC connection and write queries against the data. Therefore, I might have a tough time answering progress db specific questions.

One note is that if you plan to run these in a SQL Job, when creating the step to run the SSIS package, you will probably have to go to the “Execution Options” tab and check the “Use 32-bit Runtime” box.

Hope this saves someone some time and headaches.

sql error “the text, ntext, and image data types…”

Leave a comment

The other day I was converting an existing sql query from 2000 to 2008.  This query is based off of a table that I import every night.  I created this table using the SQL Import query and it automatically determined the field data types from a Progress 10.1 database.  The only problem is when i tried to run a query on the new 2008 server I got the following error:

The text, ntext, and image data types cannot be compared or sorted, except when using IS NULL or LIKE operator.

After doing some research, I found out that this occurred because sql made a field in one of my tables into a Text instead of a Varchar.  For whatever reason, on the import, it translated it differently.  Also, I only had this problem with this field when it was contained in a query with a “Group By” clause.  I could probably fix this on the import, but a quick and dirty fix was to convert it to a varchar on the fly.  Here’s an example  Let’s say my field is “[product-desc]”

SELECT     TOP (100) PERCENT CONVERT(varchar(200), [product-desc])
FROM         PUB.[my-table]
GROUP BY CONVERT(varchar(200), [product-desc])

That was all I needed to do to fix this problem.  You could also fix this by using CAST like so


SELECT     TOP (100) PERCENT  [product-desc]
FROM         PUB.[my-table]
GROUP BY cast([product-desc] as varchar(500))

How To Install SQL Server 2008 Management Studio on Windows 7

Leave a comment

Here’s how i got SQL Server 2008 Management Studio installed on my Windows 7 32bit Laptop.  There are problems with Windows 7 because support was not available in the initial release.  You could either slipstream Sp3  or do the following:

1.       Go to the root of the CD and right click “Setup.exe” and “Run As Administrator”

2.       Ignore all messages regarding incompatability and just continue

3.       Choose the following under the installation menu

sqlwizard1

4. Then get to Feature selection and choose the following

5.       Continue with the install

NOTE: 9/13/12 – I had to run the above 3 or 4 times before it actually let me perform the install. So be patient.

6.       While it’s installing download SQL Sp3 from here  http://www.microsoft.com/en-us/download/details.aspx?displaylang=en&id=27594

7.       Install the SP3.

That’s all I had to do to get this to work. Should be under Microsoft SQL Server 2008 in your start menu.  You might also want to install the Business Intelligence Development studio, but that’s up to you.

ASP.NET Accessing SQL Data From Codebehind Without A Control

Leave a comment

I needed to access a SQL 2008 database from my codebehind without a control like a gridview.  After scouring the internet I put together the pieces to do so.

If you were familiar with the (oldschool) “non .NET”  scripting you remember doing something like the following:

Conn = Server.CreateObject("ADODB.Connection") 
Conn.Open("ODBC-DSN", "sa", "**********") 
rs = Server.CreateObject("ADODB.Recordset") 
rs.Open(StrSQL, Conn) 
Do While Not rs.eof 
Urvariable=rs("whs-num").value 
rs.movenext() 
Loop

You can still do this in an ASPX page if you use aspcompat=”true”, but as many women have said to me throughout the years “It’s time we move on Vin” (or “no, it really IS you” but that doesn’t apply here)   So the replacement .NET code to do the same thing is…

Imports System.Data.SqlClient
Imports System.Data.Sql
Imports System.Data.SqlTypes
Dim URConnection As System.Data.SqlClient.SqlConnection
Dim URCommand As System.Data.SqlClient.SqlCommand
Dim URDataReader As System.Data.SqlClient.SqlDataReader
Dim StrSQL, URVariable as String
'Your sql string
strSQL = "Select * From Sales"
'Set your Connections and your command
URConnection = New System.Data.SqlClient.SqlConnection("server=URSERVER; initial catalog=URDB;uid=sa;pwd=********")
URConnection.Open()
URCommand = New System.Data.SqlClient.SqlCommand
URCommand.Connection = URConnection
URCommand.CommandText = StrSQL
URDataReader = URCommand.ExecuteReader()

While (URDataReader.Read)
URVariable = URDataReader.Item("whs-num")
End While

URDataReader.Close()
URDataReader = Nothing
URCommand = Nothing
URConnection.Close()
URConnection = Nothing

If you want an explanation of the newer commands, you can Google  it or look on MS’s site.  For my purposes of creating a data driven web page every once in a while, the nitty gritty is not what I’m concerned about.  I just need it to work.  If you have an aspx page that uses old asp code now, it actually is not too difficult to convert it over using a few copy and pastes and Find and Replaces.